Scheduling
Overview
How to scheule an unassigned shift
1. Ensure the roster is not grouped by employee. If it is it will schedule an assigned shift
2. Double click on the cell on the roster you want schedule a shift in

The grouping of the roster will default the shift details. For example, if the roster is grouped by location and you create a shift in the Shipside location then the shift location will default to Shipside
3. Edit the shift details as required.

4. Click "Save"
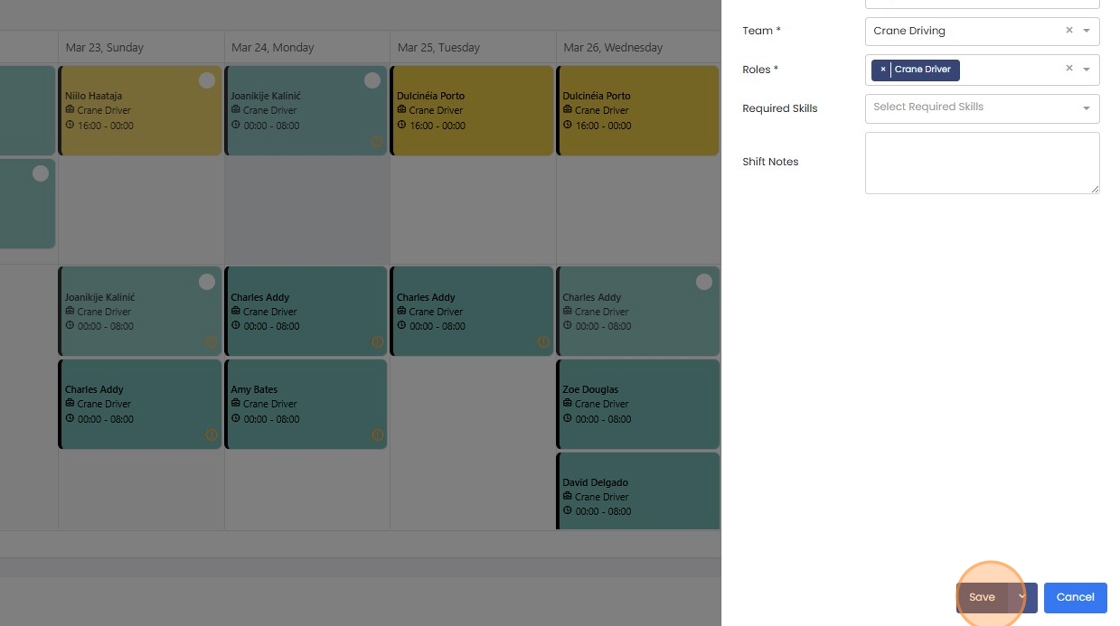
5. Your shift unfilled shift has been scheduled

If you want to assign the shift straight away, you can click the dropdown next to save and click "Save and Assign"

How to bulk schedule unassigned shifts with a bill of labour
1. Ensure the roster is not grouped by employee. Bulk scheduling with a bill of labour is not possible from these views
2. Double click on the cell on the roster you want schedule a shift in

3. Set the "From" and "To" dates for the shifts. This can be done manually or by using the shift to set the shift default times.

4. Enable "Use Bill of labour"

5. Select the Bill of Labour from the list

The Bill of Labour list is managed from the organisation settings
6. Click "Save"

7. The bill of labour has been scheduled creating the predefined shifts

How to assign an employee to a shift
1. Double click on the shift card to immediately open in edit mode, or

single click on the card and then click edit on the shift details popup

3. Click "Assign Employee"

You cannot assign an employee if they are not qualified, available, or if rostering them would break a fatigue rule. Read more about the candidate checks the next section.
4. Select the employee you wish to assign
5. Click "Assign"

6. Your shift has been assigned

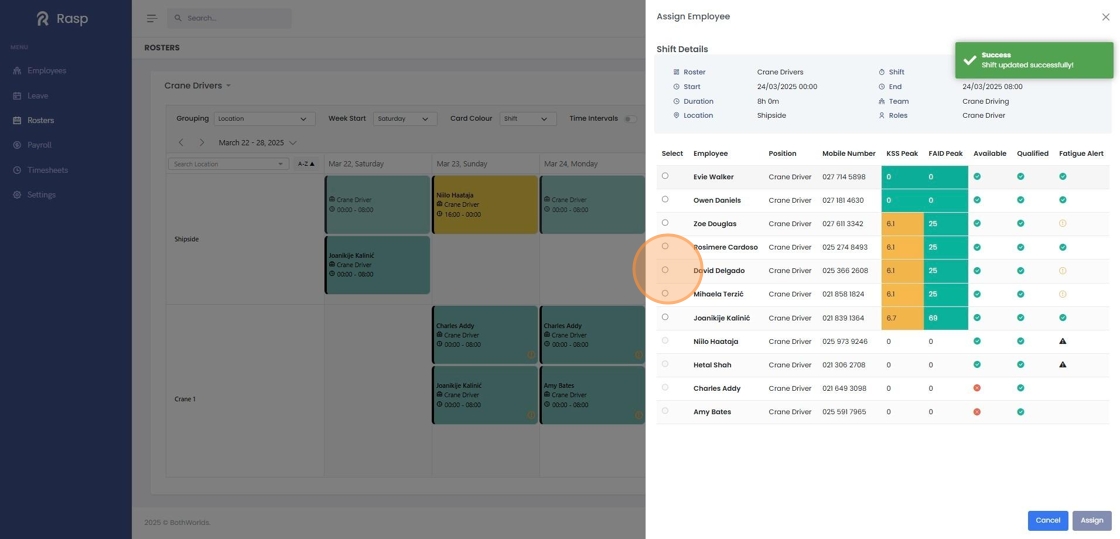
Understanding the candidate list on Assign shift
When assigning employees to shifts, the candidate list displays various checks and alerts to help you make informed decisions. These indicators help identify potential issues with scheduling an employee for a particular shift.
The alert system uses the following indicators:
✅ Green tick indicates no alerts or concerns for this check.
⚠️ Yellow warning (!) indicates a potential issue that requires attention.
You can hover over any alert symbol to view detailed information about the specific concern.
KSS Peak and FAID Peak
The KSS Peak and FAID Peak scores are part of the FAID Quantum integratio and estimate the employees peak fatigue likelihood for the proposed shift.

Availablity Check
The Available check identifies scheduling conflicts such as: Existing shift assignments with overlapping times, and conflicts with approved leave or scheduled RDOs. It will also indicate if the employee is unavailble because the assignment would break a configured fatigue management business rule.
Qualification Check
The Qualified check ensures that employees can only be assigned to shifts if they have the Roles and Required Skills Assigned to them.

Furture Fatigue Impact
The Fatigue Alert looks at the flow on impact of assigning this employee to their fatigue liklihood. This is enabled as part of the FAID Quantum integration. It will alert if scheduling the employee will cause fatigue alerts on upcoming scheduled shifts.

How to schedule a shift for an employee
1. Ensure the roster is grouped by employee. Every row should have an employee name on it
2. Double click on the cell on the roster you want schedule a shift in

3. The Add Shift panel will display with the Assigned Employee shown at the top

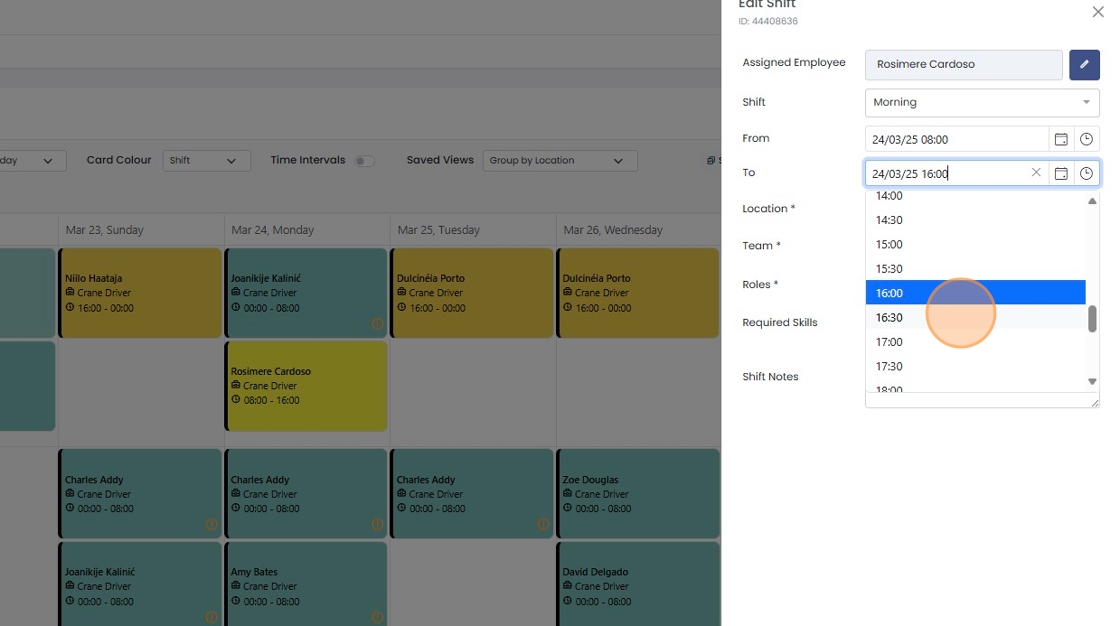
4. Fill in the shift details as required

The locations available are assigned to the roster in settings.
The Teams, Roles and Skills are also assigned in settings but only those that the employee holds will be available for selection
5. If you wish to validate this shift manually and confirm, click the dropdown next to save and click "Validate"

If you click "Save" then the validation checks are still completed but the shift will automatically save if there are no medium or high level alerts

7. If validation finds alerts, then you will need to "Confirm Save" to schedule the shift.


The validation checks here will ensure that the employee does not have a conflicting leave entry, RDO, or shift and that scheduling won't break and configured fatigue rules.
If the FAID Quatum Integration is enabled the alerts will include the Peak KSS and Peak FAID scores for the current shift as well as the forecast impact of scheduling on the employee's future shifts.
How to reassign a shift to another employee
1. Click on a card

2. Click on the pencil icon next to the assigned employee's name

3. Click "Reassign"

If you are already in the shift editor, you can click the pencil icon next to the employee's name here too

4. Select the employee you wish to reassign the shift to

5. Click "Assign"

6. The shift has been reassigned

How to unassign a shift
1. Click on the shift you wish to unassign
2. Click the pencil icon next to the assigned employee's name

3. Click "Unassign"

4. The shift is now unassigned

The shift can also be unassigned from the editor you will need to Save or Save and Assign for the change to take effect

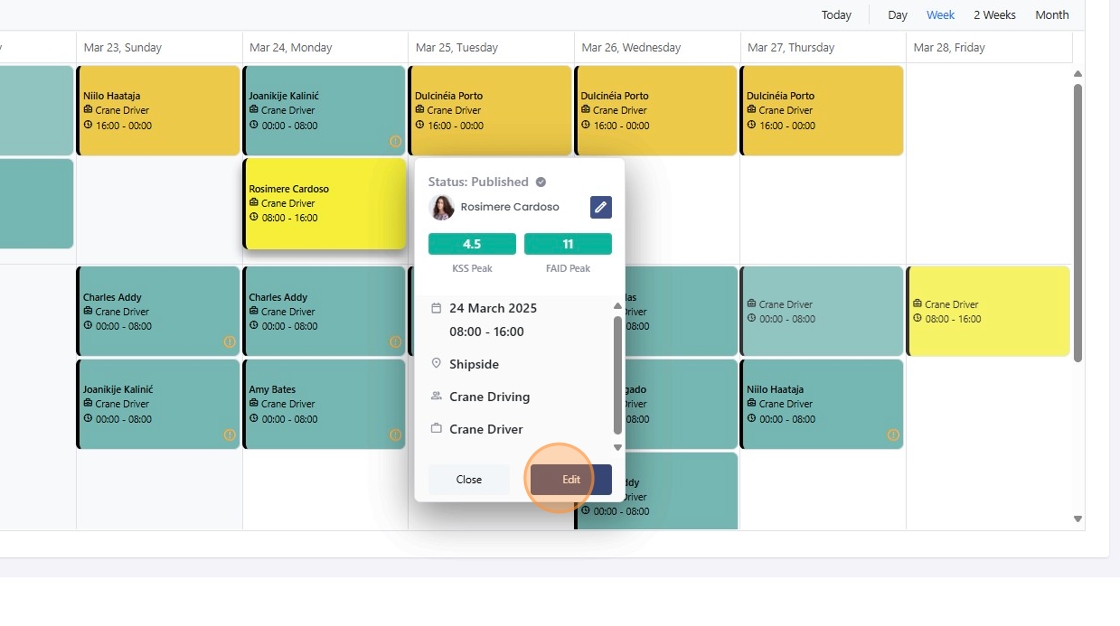
How to edit shift details
1. To open the editor double click on the shift or single click and then "Edit" on the shift details popup
2. Modify the shift as required
If the shift is unassigned the locations, teams, roles and skills available are those assigned to the roster.
If the shift is assigned the teams, roles, and skills will only be available if the employee has them assigned.
3. Click "Save"

Validation is automatically completed on every save. If validation returns warnings then you will need to "Confirm and Save" if you want the changes to apply.

5. Your shift has been edited and unpublished

Don't forget to Publish the shift if you want the employee to see it.
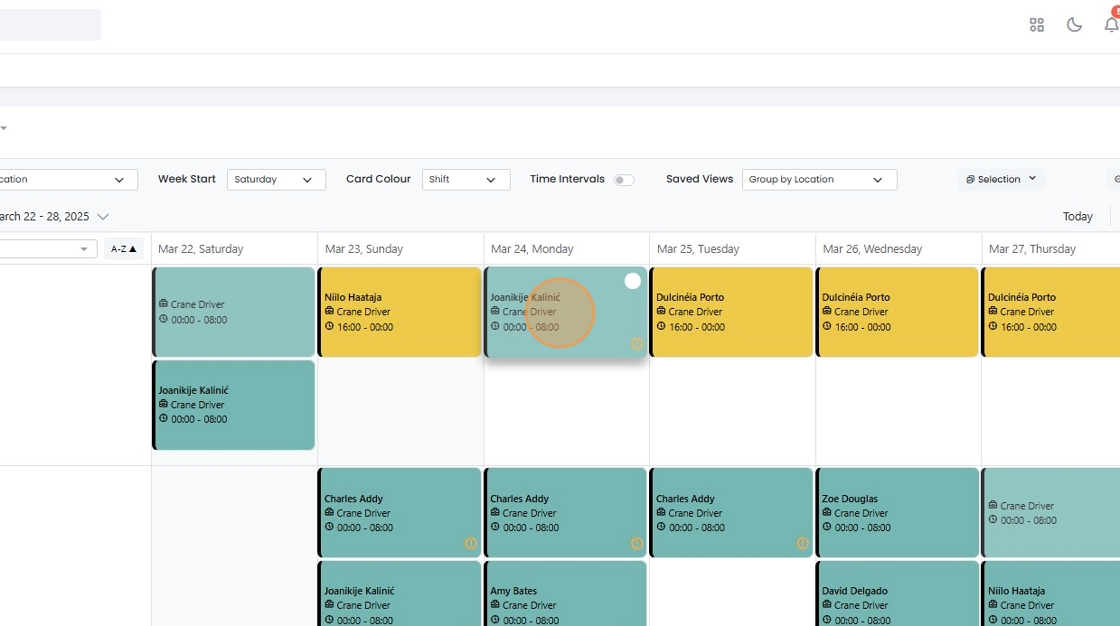
How to publish shifts
Unpublished shift cards will be a lighter shade, and unpublished assigned shifts have the checkbox in the top right corner
1. Check the boxes of the shift or shifts you want to publish

The "Publish" button will show you how many shifts have been selected for publishing
2. Click "Publish"

3. The shift(s) have been published and will be solid coloured and won't have the checkbox.

How to publish all unpublished shifts in view
This will publish all unpublished shifts in the current view.
If you only want to publish a single day you can switch to the day view
1. Click "Selection"

2. Click "Select All Unpublished"

3. Click "Publish"

4. All selected shifts are published

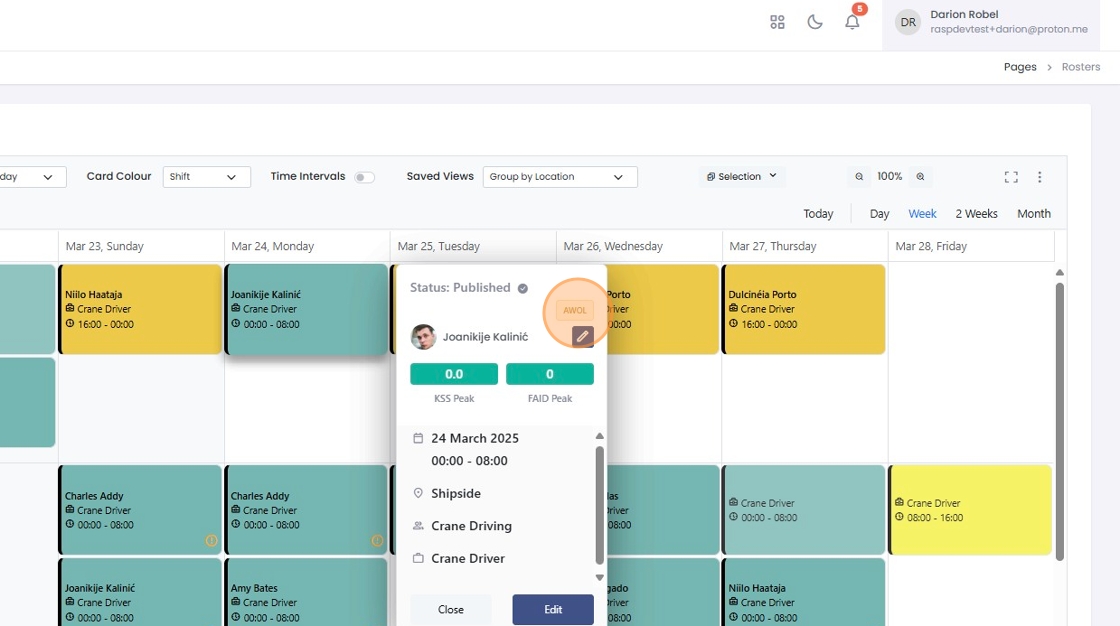
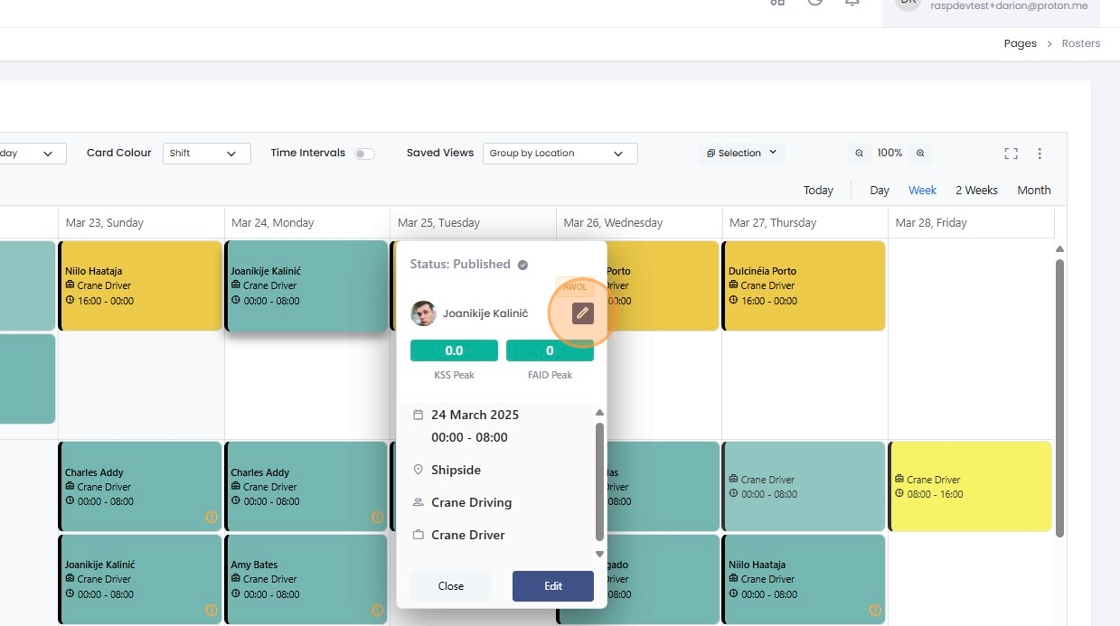
How to mark an employee AWOL
1. Single click on a shift to diplay the details and then click the pencil next to the assigned employee's name

2. Click "Mark AWOL"

The employee can also be marked as AWOL from the shift editor

3. AWOL is indicated on the shift details flyout and panel
4. Click "AWOL"

How to unmark an employee AWOL
1. Single click to open the shift details popup and click the pencil next to the employee's name
2. Click "Undo AWOL"

AWOL can also be undone form the shift editor

How to delete shifts
Deleting shifts is permanent
1. Open the shift editor by double clicking on the shift or by clicking "Edit" on the shift details popup

2. Click "Delete"

3. The shift has been permanently deleted
